How to Host Multiple Websites on One VPS Server
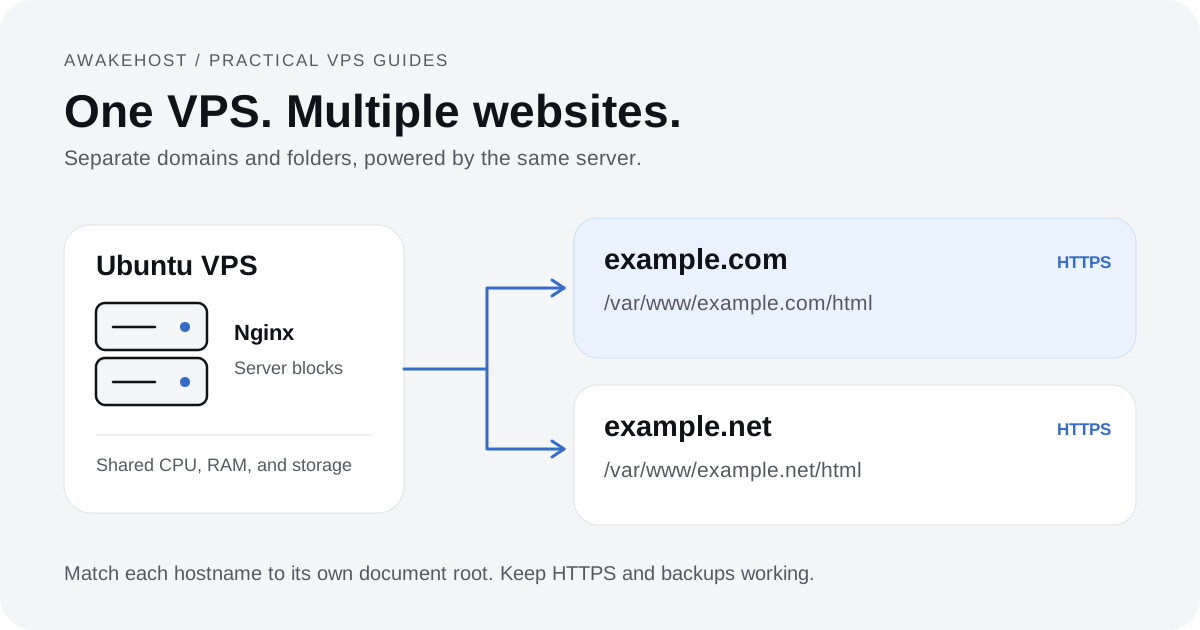
You don't need a separate server for every website you own. A single VPS can host several domains, each with its own files, configuration, and SSL certificate.
For example, you might run a company website, a personal blog, and a client portfolio on the same server. Visitors see three independent websites, even though they share one VPS and its computing resources.
The process is straightforward once you understand how a web server handles multiple domains.
In this tutorial, you'll learn how to host multiple websites on one VPS using Ubuntu and Nginx. We'll configure two websites from scratch, connect their domains, enable HTTPS, and cover a few problems you might encounter.
You don't need prior Nginx experience. You should be comfortable using SSH, editing files in a terminal, and checking command output. The examples serve static HTML sites; WordPress and Node.js need extra configuration.
Can You Host Multiple Websites on One VPS?
Yes. A VPS can host multiple websites as long as it has enough CPU, RAM, storage, and network capacity to handle their combined workloads.
You can also point several domain names to the same public IP address.
Nginx uses a feature called server blocks to determine which website a visitor wants to open. Each server block connects a domain name to the correct website directory.
Here's a simple example:
| Domain | Website directory |
|---|---|
| example.com | /var/www/example.com/html |
| example.net | /var/www/example.net/html |
Both domains point to the same VPS IP address.
When someone visits example.com, Nginx serves the files from the first directory. When someone visits example.net, it serves the files from the second.
The websites remain separate at the configuration and file-directory level, although they still share the same operating system and server resources.
What you'll build: Two working websites, each accessible through its own domain over HTTPS, running on a single Ubuntu VPS.
What You'll Need Before Starting
Make sure you have the following:
| Requirement | Details |
|---|---|
| VPS server | A Linux VPS with sufficient resources |
| Operating system | Ubuntu 24.04 LTS |
| Server access | SSH account with sudo privileges |
| Domain names | Two domains you can manage |
| Public IP | IPv4 address assigned to the VPS |
| Web server | Nginx, installed during this tutorial |
We'll use example.com and example.net as sample domains. Replace them with domains you actually own.
You'll also need your VPS public IP address. You can usually find it in your hosting provider's control panel.
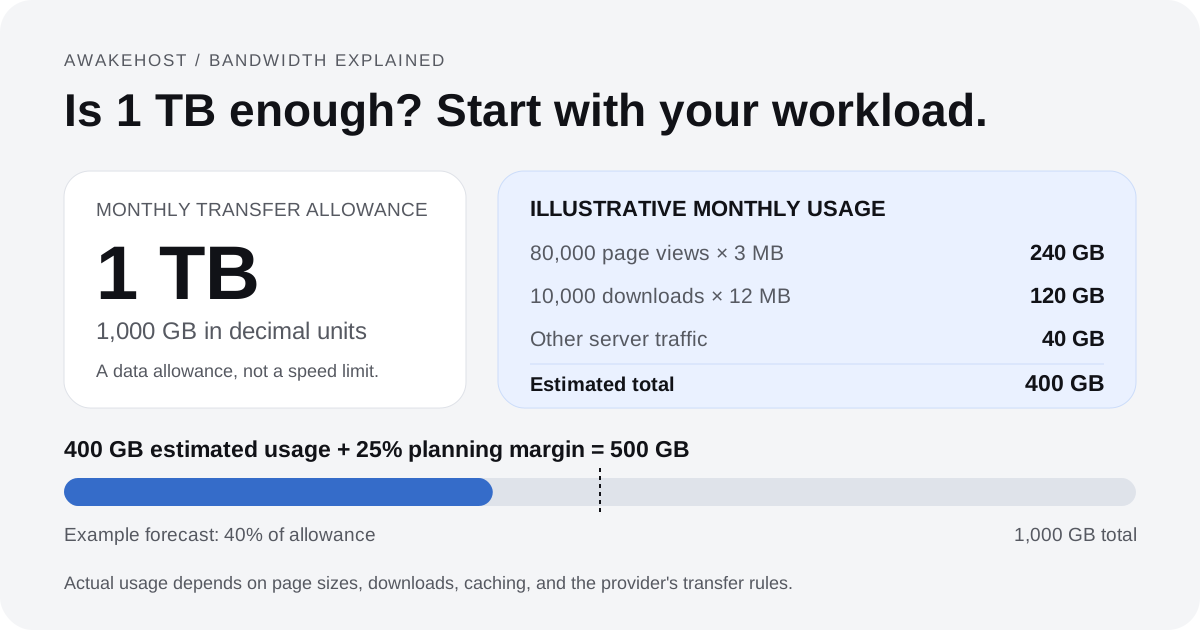
How Much RAM Do You Need?
There's no fixed limit to the number of websites a VPS can host.
Two simple HTML websites may consume very little memory. Two busy WordPress stores can require considerably more resources.
For planning purposes:
- 1–2 GB RAM: A reasonable starting point for a few lightweight static websites.
- 2–4 GB RAM: Worth evaluating for a small group of low-traffic WordPress or PHP websites.
- 4–8 GB RAM or more: Consider this range for heavier websites, larger databases, or several active applications.
These are planning estimates, not guaranteed capacities. A site running WooCommerce, scheduled tasks, and numerous plugins may use more memory than several basic business websites combined.
Start with the applications you intend to host, then monitor resource usage after deployment.
Step 1: Connect to Your VPS Using SSH
First, open a terminal on your computer.
On Windows, you can use Windows Terminal or an SSH client. On macOS and Linux, the built-in Terminal application works.
Connect to your VPS with:
ssh ubuntu@203.0.113.10Replace 203.0.113.10 with your actual server IP address.
The username may differ depending on your VPS image. Some servers use ubuntu, while others use a separately configured administrator account.
Once connected, update the package information and install available operating system updates:
sudo apt update
sudo apt upgrade
Review significant updates and reboot if required before continuing, especially on an existing production server.
If you're using an existing VPS, back up the websites and web server configuration first. Check that another web server is not already using ports 80 and 443. Keep your provider's recovery console available while changing network access.
Important: This tutorial assumes you're managing Nginx directly. If your server already uses cPanel, Plesk, CyberPanel, or another hosting control panel, use that panel's domain-management features. Manual Nginx changes may conflict with panel-generated configurations.
Step 2: Install Nginx on Ubuntu
Nginx is a web server that receives requests from browsers and delivers the appropriate website content.
We'll use it to manage both domains.
Install Nginx with:
sudo apt install nginx -yAfter installation, confirm that it's running:
sudo systemctl status nginxLook for:
Active: active (running)If the service is not running, start it:
sudo systemctl start nginxYou can also enable it to start automatically when the VPS boots:
sudo systemctl enable nginxNow enter your VPS IP address in a browser:
http://203.0.113.10You should see the default Nginx welcome page.
This confirms that the web server is responding.
Check Your Firewall
Nginx needs ports 80 and 443 for HTTP and HTTPS traffic.
Ubuntu commonly uses UFW to manage its firewall rules.
If UFW is installed, allow web traffic:
sudo ufw allow 'Nginx Full'Before enabling UFW, make sure your actual SSH port is allowed. For a server using the standard SSH port:
sudo ufw allow 22/tcpIf SSH uses a different port, allow that port instead.
Then check your rules:
sudo ufw status
sudo ufw show added
If UFW is inactive and you have confirmed the SSH access rule, you can enable it:
sudo ufw enableDon't enable a firewall without confirming SSH access first. An incorrect rule could disconnect you from the VPS.
Also check whether your hosting provider has a separate network firewall. Ports 80 and 443 must be permitted there as well.
Step 3: Point Both Domains to Your VPS
Your server needs to know which domains it should handle, but DNS configuration comes first.
Log in to the platform where you manage your domains' DNS records.
Create the following records:
| DNS zone | Type | Host | Value |
|---|---|---|---|
| example.com | A | @ | Your VPS IPv4 address |
| example.com | CNAME | www | example.com |
| example.net | A | @ | Your VPS IPv4 address |
| example.net | CNAME | www | example.net |
The first two records belong to the DNS zone for example.com. The remaining records belong to example.net.
An A record connects a domain name to an IPv4 address. A CNAME record can direct the www hostname to the main domain.
For this setup, both domains should ultimately resolve to the same VPS.
If your DNS provider already has conflicting records, review them before adding replacements.
Pay particular attention to existing AAAA records. An AAAA record points to an IPv6 address. If it points somewhere other than your working VPS, some visitors may reach the wrong server.
DNS updates can take time to appear across different networks.
You can check the IPv4 result from your terminal with:
getent ahostsv4 example.com
getent ahostsv4 www.example.com
Repeat for the second domain:
getent ahostsv4 example.net
getent ahostsv4 www.example.net
The returned addresses should include your VPS IPv4 address.
Once DNS is correct, you can move on to the website directories.
Step 4: Create a Separate Directory for Each Website
Each website needs its own document root.
A document root is simply the directory where Nginx looks for files such as index.html, images, stylesheets, and JavaScript files.
We'll create two directories inside /var/www/.
Run:
sudo mkdir -p /var/www/example.com/html
sudo mkdir -p /var/www/example.net/html
Your file structure now looks like this:
/var/www/
├── example.com/
│   └── html/
└── example.net/
    └── html/
Next, give your current SSH user ownership of these new website directories:
sudo chown -R "$USER":"$(id -gn)" /var/www/example.com
sudo chown -R "$USER":"$(id -gn)" /var/www/example.net
This allows your account to edit the site files without making the directories writable by everyone.
Keep the new document roots readable and traversable by Nginx. Set permissions on these public website directories:
sudo chmod 755 /var/www/example.com /var/www/example.com/html
sudo chmod 755 /var/www/example.net /var/www/example.net/html
Use 644 for public files. Keep passwords, private keys, and application secrets outside the public document root.
Avoid using chmod 777. It grants unnecessary write permissions.
Step 5: Add a Test Page to Each Website
Before uploading your real website files, create a basic HTML page for each domain.
This makes it easy to confirm that Nginx is loading the correct directory.
Open the first website's index file:
nano /var/www/example.com/html/index.htmlPaste:
<!DOCTYPE html>
<html lang="en">
<head>
    <meta charset="UTF-8">
    <title>Example.com</title>
</head>
<body>
    <h1>Welcome to Example.com</h1>
    <p>This is our first VPS website.</p>
</body>
</html>
Save the file using Ctrl + O, press Enter, and exit with Ctrl + X.
Now create the second page:
nano /var/www/example.net/html/index.htmlPaste:
<!DOCTYPE html>
<html lang="en">
<head>
    <meta charset="UTF-8">
    <title>Example.net</title>
</head>
<body>
    <h1>Welcome to Example.net</h1>
    <p>This is our second VPS website.</p>
</body>
</html>
Save and exit again. Make both public test pages readable by Nginx:
chmod 644 /var/www/example.com/html/index.html /var/www/example.net/html/index.htmlBoth websites now have content, but Nginx hasn't been told which domain belongs to which directory.
We'll fix that next.
Step 6: Configure Nginx Server Blocks for Both Domains
A server block tells Nginx how to handle requests for a particular domain.
Think of it as a routing instruction:
When a visitor requests this domain, serve content from this directory.
We'll create one configuration file for each website.
Configure the First Website
Create the Nginx configuration file:
sudo nano /etc/nginx/sites-available/example.comAdd:
server {
    listen 80;
    listen [::]:80;

    server_name example.com www.example.com;

    root /var/www/example.com/html;
    index index.html;

    access_log /var/log/nginx/example.com.access.log;
    error_log /var/log/nginx/example.com.error.log;

    location / {
        try_files $uri $uri/ =404;
    }
}
Save the file.
Here's what the main settings mean:
| Directive | Purpose |
|---|---|
listen 80 | Accepts HTTP requests |
server_name | Identifies the domain names |
root | Defines the website directory |
index | Specifies the default page |
access_log | Records incoming requests |
error_log | Records relevant server errors |
try_files | Checks for the requested file or directory |
The server_name directive is particularly important. Nginx's request-processing guide explains how the requested hostname selects a server block. If IPv6 is disabled on your VPS, omit listen [::]:80; from both examples.
It allows Nginx to match an incoming request to the correct website, even when several domains share the same server IP.
Configure the Second Website
Create another configuration file:
sudo nano /etc/nginx/sites-available/example.netAdd:
server {
    listen 80;
    listen [::]:80;

    server_name example.net www.example.net;

    root /var/www/example.net/html;
    index index.html;

    access_log /var/log/nginx/example.net.access.log;
    error_log /var/log/nginx/example.net.error.log;

    location / {
        try_files $uri $uri/ =404;
    }
}
Save the file.
Notice that both server blocks use port 80.
You don't need to assign a separate HTTP port to every website. Nginx uses the requested hostname to select the matching server block.
Each domain has a different server_name and document root, which is how the websites remain distinct.
Step 7: Enable Both Websites in Nginx
Creating the configuration files isn't enough. You must also enable them.
On Ubuntu, Nginx normally uses two directories:
/etc/nginx/sites-available/stores website configurations./etc/nginx/sites-enabled/contains links to the configurations Nginx should load.
Enable the first website:
sudo ln -s /etc/nginx/sites-available/example.com /etc/nginx/sites-enabled/Enable the second:
sudo ln -s /etc/nginx/sites-available/example.net /etc/nginx/sites-enabled/If a symbolic link already exists, inspect it instead of creating a duplicate. On an existing server, use new configuration filenames and check for conflicting server_name entries.
Now check whether the Nginx configuration is valid:
sudo nginx -tIf everything is correct, you should receive messages similar to:
nginx: configuration file /etc/nginx/nginx.conf syntax is ok
nginx: configuration file /etc/nginx/nginx.conf test is successful
Apply the changes:
sudo systemctl reload nginxReloading allows Nginx to use the updated configuration without performing a full service restart.
Test Both Websites
Open these addresses in your browser:
http://example.com
http://example.net
The first domain should display:
Welcome to Example.comThe second should display:
Welcome to Example.netIf both domains show their respective pages, your multiple-website configuration is working.
You can also test from the terminal:
curl -I http://example.com
curl -I http://example.net
For a working test page, you'll typically see an HTTP 200 OK response.
If DNS hasn't updated yet, you can test the first site's Nginx routing directly by substituting your VPS IP address here:
curl --resolve example.com:80:203.0.113.10 http://example.com/Repeat with the second domain.
This sends the request to your chosen IP while using the correct domain name for Nginx's server-block selection.
Step 8: Install Free SSL Certificates With Let's Encrypt
Both websites are now available over HTTP.
The next step is enabling HTTPS so browsers can establish encrypted connections to each domain.
We'll use Let's Encrypt certificates with Certbot.
Certbot can obtain certificates and update compatible Nginx configurations automatically.
Install Certbot
First, make sure Snap is available on the server.
On standard Ubuntu 24.04 installations, Snap is commonly already present. If your minimal VPS image doesn't include it, install it with:
sudo apt install snapd -yCheck whether Certbot is already installed before adding the Snap version. Use one installation method. If you are switching from another package, follow the official Certbot instructions. Keep existing certificate files and renewal settings.
Install Certbot:
sudo snap install --classic certbotFor a new Snap installation, create the command link if /usr/local/bin/certbot does not already exist:
sudo ln -s /snap/bin/certbot /usr/local/bin/certbotEnable HTTPS for the First Domain
Run:
sudo certbot --nginx -d example.com -d www.example.comFollow the prompts.
Certbot will attempt to verify that the requested domain names reach your server and then install the certificate.
Both example.com and www.example.com must resolve correctly for this command to succeed. The Nginx plugin uses HTTP validation, which needs public access on port 80. See Let's Encrypt's HTTP-01 challenge guide.
Enable HTTPS for the Second Domain
Run:
sudo certbot --nginx -d example.net -d www.example.netComplete the prompts for the second certificate.
Afterward, visit:
https://example.com
https://example.net
Both websites should load through HTTPS.
Choose HTTP-to-HTTPS redirection when prompted. Then check both HTTP and HTTPS addresses, including the www names. HTTP requests should redirect to HTTPS, and each HTTPS hostname should have a valid certificate.
Check Automatic SSL Renewal
Let's Encrypt certificates need periodic renewal.
Certbot's supported Snap installation provides automated renewal facilities.
Test the renewal process with:
sudo certbot renew --dry-runIf the simulation succeeds, renewal is configured to work under the current conditions.
You'll still need to keep DNS and certificate validation access working so future renewals can complete.
Note: This procedure uses ordinary domain certificates. Wildcard certificates, such as those covering *.example.com, have different validation requirements.
Step 9: Upload Your Actual Website Files
Your server is now hosting two basic HTML websites.
You can replace the test pages with your real websites.
For static HTML, CSS, and JavaScript websites, upload the production files into the appropriate document root.
For example:
/var/www/example.com/html/
├── index.html
├── about.html
├── contact.html
├── css/
│   └── style.css
└── images/
    └── logo.png
You can transfer files using SFTP or SCP.
Here's an example SCP command to run from your local computer:
scp -r ./website/. ubuntu@203.0.113.10:/var/www/example.com/html/This copies the contents of a local website folder into the first domain's document root.
Replace the username, IP address, and local folder path with your own.
Your SSH account needs permission to write to the destination directory.
Repeat the process for the second domain using its own folder.
If you're deploying a static site generated with Astro or another framework, upload its compiled output rather than the development source files.
For a typical Astro static build, that means the generated files in the dist directory.
Remember to preserve your website-specific files during future updates. Don't upload one site's content over another site's document root.
Can You Host Multiple WordPress Websites on the Same VPS?
Yes. Multiple WordPress installations can run on one VPS, but they require additional configuration beyond the static HTML setup above.
WordPress needs PHP and a database server, such as MySQL or MariaDB.
For separate WordPress installations, you should create:
- An individual website directory for each domain.
- A separate database and database account for each installation.
- A suitable PHP-FPM configuration for processing PHP requests.
- An Nginx configuration that supports WordPress routing.
- Appropriate file permissions, backups, and access controls.
The try_files rule used in our static website examples doesn't provide everything WordPress needs.
WordPress commonly uses a rule similar to:
location / {
    try_files $uri $uri/ /index.php?$args;
}
You must also configure PHP-FPM to execute PHP requests securely. Simply adding this rule won't make WordPress work.
For stronger separation, consider using different system users and PHP-FPM pools for each website instead of running every site's PHP code under the same account.
This matters particularly when hosting unrelated client websites.
Separate WordPress Installations vs WordPress Multisite
These are different approaches.
Separate WordPress installations give each website its own WordPress files and database configuration. Each can generally be maintained independently.
WordPress Multisite uses one WordPress installation to manage a network of sites. The sites share the underlying WordPress codebase and database installation, although their content is organized separately.
For businesses managing unrelated client websites, independent installations may offer greater operational flexibility.
For a network of related websites maintained by one organization, WordPress Multisite may be worth considering.
Choose based on your update process, plugin requirements, administration needs, and desired separation.
Can You Use cPanel Instead of Nginx Configuration Files?
Yes.
If you prefer a graphical interface, a compatible hosting control panel can make managing multiple websites easier.
Common options include cPanel/WHM, Plesk, and DirectAdmin.
Depending on the panel and license, you may be able to manage domains, website files, databases, SSL certificates, and backups without manually creating web server configuration files.
However, a control panel consumes server resources and may require a paid license.
Also note that cPanel/WHM is different from a typical shared-hosting cPanel account. WHM handles server-level account management, while cPanel provides individual account-level features.
If you only need to host two static websites, manual Nginx configuration is perfectly reasonable.
If you're managing dozens of customer websites, a control panel may save considerable administration time.
How Many Websites Can One VPS Handle?
You may be able to host two, ten, or more websites on one VPS.
The number alone doesn't tell you much about the workload.
Consider two scenarios.
Scenario A: Ten small business websites
Each site contains a few static pages, images, and contact information. Visitor traffic is modest, and the websites rarely run expensive server-side processes.
A relatively small VPS might handle this workload comfortably.
Scenario B: Three busy WooCommerce stores
Each store processes customer sessions, shopping carts, database queries, payment requests, and background tasks.
Even with fewer websites, this setup can require substantially more CPU and memory.
The difference comes from what each website does, not how many domains point to the server.
Monitor Your VPS Resources
After deploying your sites, check resource usage regularly.
To view memory usage:
free -hTo see storage usage:
df -hTo monitor active processes:
topPay attention to sustained CPU load, memory pressure, disk capacity, and the performance of your busiest application.
If one website starts using most of the available resources, the others may slow down.
You can reduce that risk through sensible application configuration, caching, monitoring, and resource planning.
For large or unrelated workloads, separate VPS instances may provide a better operational boundary.
Common Problems When Hosting Multiple Websites on One VPS
Even a small mistake in DNS or Nginx configuration can make a website display the wrong content or fail to load.
Here are the issues worth checking first.
Both Domains Show the Same Website
This usually points to a DNS or server-block configuration problem.
Check that each domain has its own server_name and document root.
You can inspect the active Nginx configuration with:
sudo nginx -TReview the server_name and root entries for both websites.
If Nginx cannot find a matching server block, the request may be handled by the default server instead.
Also verify that the domains resolve to the correct IP address.
A Website Shows 403 Forbidden
A 403 error commonly occurs when Nginx cannot access the requested content or when a directory lacks an appropriate index file.
Check whether index.html exists in the configured document root.
Then examine the website's file and directory permissions.
For our first example, you can inspect permissions using:
ls -ld /var/www/example.com/html
ls -l /var/www/example.com/html/
Avoid fixing permission problems by allowing unrestricted write access.
The Domain Doesn't Load
First, check DNS records and the VPS firewall.
Then confirm that Nginx is running:
sudo systemctl status nginxTest the configuration:
sudo nginx -tYou should also confirm that ports 80 and 443 are open in both the operating system firewall and any provider-level firewall.
The SSL Certificate Fails to Install
Certificate issuance commonly fails when DNS points to the wrong server, the requested hostname isn't configured correctly, or certificate validation traffic cannot reach the VPS.
Confirm that every domain included in the Certbot command points to the intended server.
Make sure port 80 is accessible for the HTTP validation method used in this tutorial.
Then review Certbot's reported error before retrying.
A Website Displays 404 Not Found
A 404 error means the requested resource wasn't found by the selected website configuration.
Check that the file exists at the expected location and that the Nginx root directive points to the correct directory.
For a static website, confirm that the homepage is named index.html.
If you're running WordPress or another application with dynamic routes, you'll need the appropriate application-specific routing configuration.
Nginx Won't Reload After Editing a Configuration
Run:
sudo nginx -tNginx will usually identify the configuration file and line responsible for a syntax error.
Correct the issue and test again.
Only reload Nginx after the configuration test succeeds.
For website-specific errors, inspect the log you configured earlier:
sudo tail -n 50 /var/log/nginx/example.com.error.logThis often provides a more useful explanation than the message shown in the browser.
Security Tips for Hosting Several Websites on One VPS
Hosting several websites on the same operating system is convenient, but a server problem can affect all of them.
Keep these precautions in mind.
- Maintain regular updates. Apply security patches to Ubuntu, Nginx, PHP, databases, and installed applications.
- Use separate credentials. Avoid sharing database accounts or unnecessary administrative access between websites.
- Keep backups outside the VPS. A local backup won't help if the server's storage becomes unavailable or is lost. Test restoration procedures periodically.
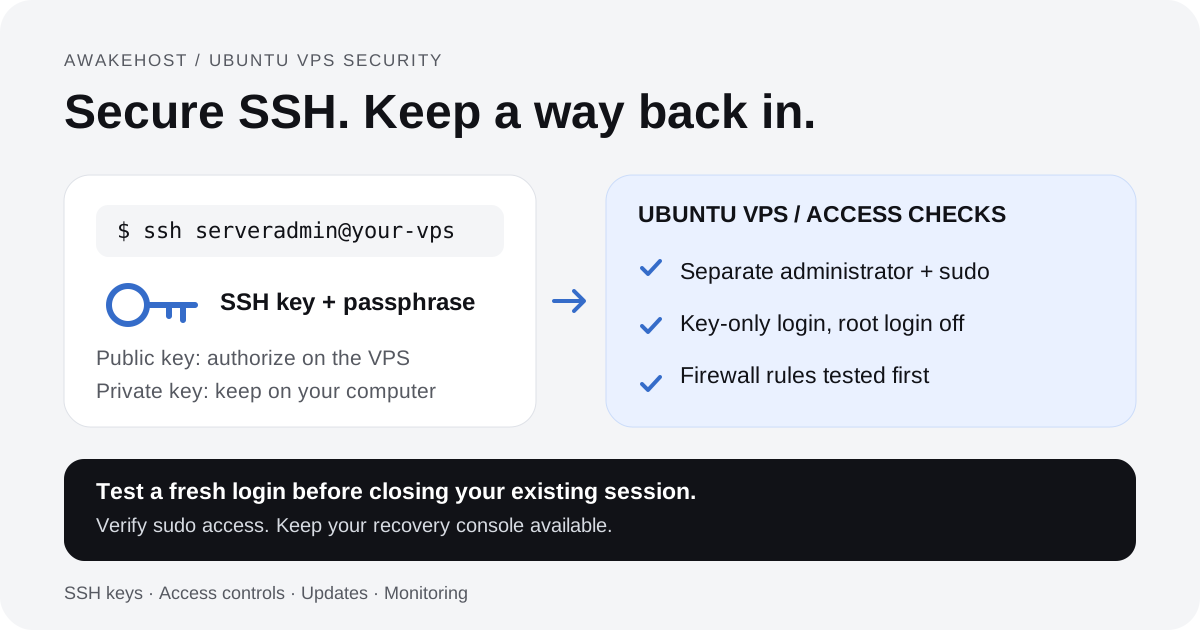
- Restrict administrative access. Use SSH keys where possible, protect privileged accounts, and review firewall rules.
- Separate application processes where necessary. Different folders alone don't provide strong security isolation. For multiple PHP websites, separate users and PHP-FPM pools can reduce some cross-site risks.
- Monitor all websites. One compromised or overloaded application may affect other websites sharing the same server.
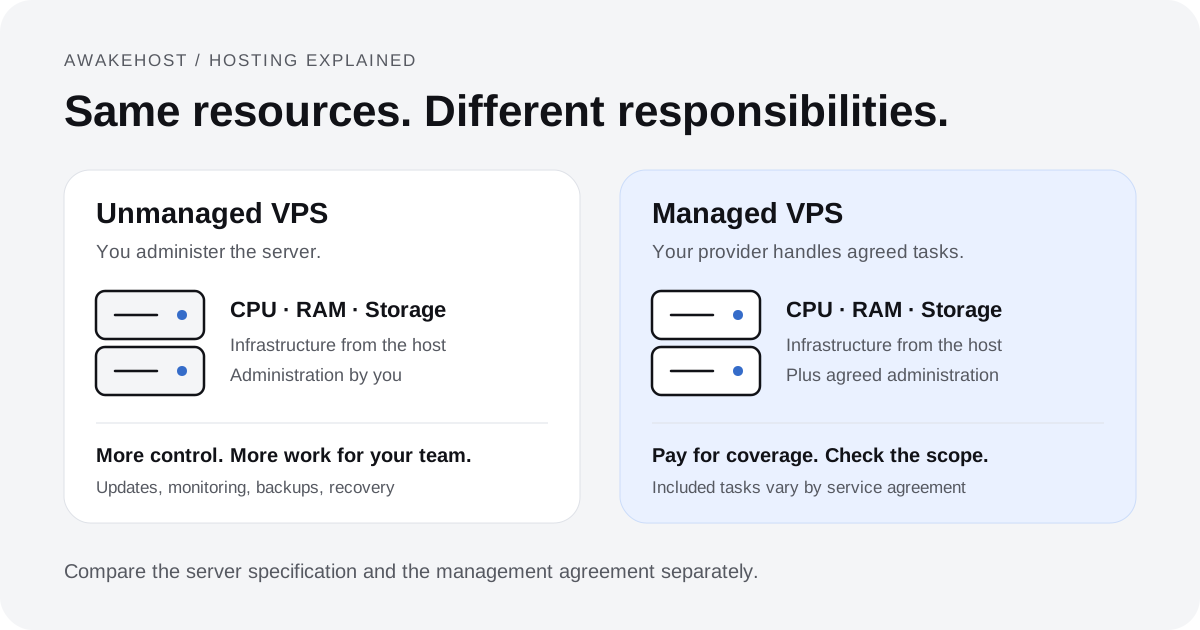
If you're hosting unrelated customers or applications with strict security requirements, consider separate VPS instances or stronger isolation arrangements. Read our managed vs unmanaged VPS guide to understand who handles updates, monitoring, and recovery.
Is Hosting Multiple Websites on One VPS a Good Idea?
For many website owners, yes.
Running several small websites on one VPS can reduce hosting costs and simplify server administration. You maintain one operating system, one web server installation, and a centralized place to monitor resources.
It's particularly useful for a small business operating multiple domains, a developer managing personal projects, or an agency hosting a modest number of low-traffic websites.
The trade-off is shared responsibility and shared capacity.
If the VPS goes offline, every website hosted on it may become unavailable. If one application consumes excessive resources, other applications may suffer.
As your websites grow, review whether they still belong on the same server.
There's no reason to split a lightweight setup across several VPS instances simply because you own several domains. Equally, there's no reason to keep a demanding application on a crowded server when its workload calls for separate resources.
Final Thoughts
Hosting multiple websites on one VPS doesn't require multiple IP addresses or separate web server installations.
With Ubuntu and Nginx, you can point several domains to the same VPS, create individual website directories, and use server blocks to direct each request to the correct content.
In this tutorial, you've configured two independent websites, connected their domains, and added HTTPS certificates.
The same approach can accommodate additional static websites by repeating the directory, DNS, and server-block setup for each new domain.
For WordPress or other dynamic applications, you'll also need the appropriate runtime, database, and security configuration.
Need a VPS for multiple websites?
Explore AwakeHost VPS hosting to compare CPU, RAM, storage, and available server locations. You can choose a configuration based on the websites you plan to host rather than paying for separate servers unnecessarily.
Frequently Asked Questions
Can I host multiple websites on one VPS with a single IP address?
Yes. Nginx can identify websites by their domain names and direct requests to different server blocks. You can also configure HTTPS for multiple domains using TLS Server Name Indication (SNI).
Do I need separate SSL certificates for every website?
Each hostname needs valid certificate coverage, but that doesn't always mean a separate certificate file. You can issue individual certificates or use a multi-domain certificate. Include both the main domain and its www name when you use both.
Is Nginx better than Apache for hosting multiple websites?
Both Nginx and Apache support multiple websites through virtual hosting. Nginx is a suitable choice for static websites and reverse proxy setups, while Apache is also widely used for PHP-based hosting. Choose based on your application, configuration requirements, and experience.
Can I host five WordPress websites on one VPS?
Yes, provided your server has enough resources and each WordPress installation is configured correctly. CPU usage, memory requirements, plugins, traffic, and database activity matter more than the number of installations.
Will one website affect the performance of another?
It can. Websites on the same VPS share resources such as CPU, RAM, storage performance, and network capacity. A busy or poorly configured application may consume resources needed by the others.
Do I need a control panel to host multiple domains?
No. You can host multiple domains using Nginx server blocks without installing cPanel, Plesk, or another panel. A control panel is optional and may be useful when you manage many websites.
Can I host HTML, WordPress, and Node.js websites on the same VPS?
Yes. Nginx can serve static HTML files, pass PHP requests to PHP-FPM, and act as a reverse proxy for Node.js applications. Each application needs its own appropriate configuration and resource allocation.