How to Secure SSH Access on Ubuntu VPS Servers
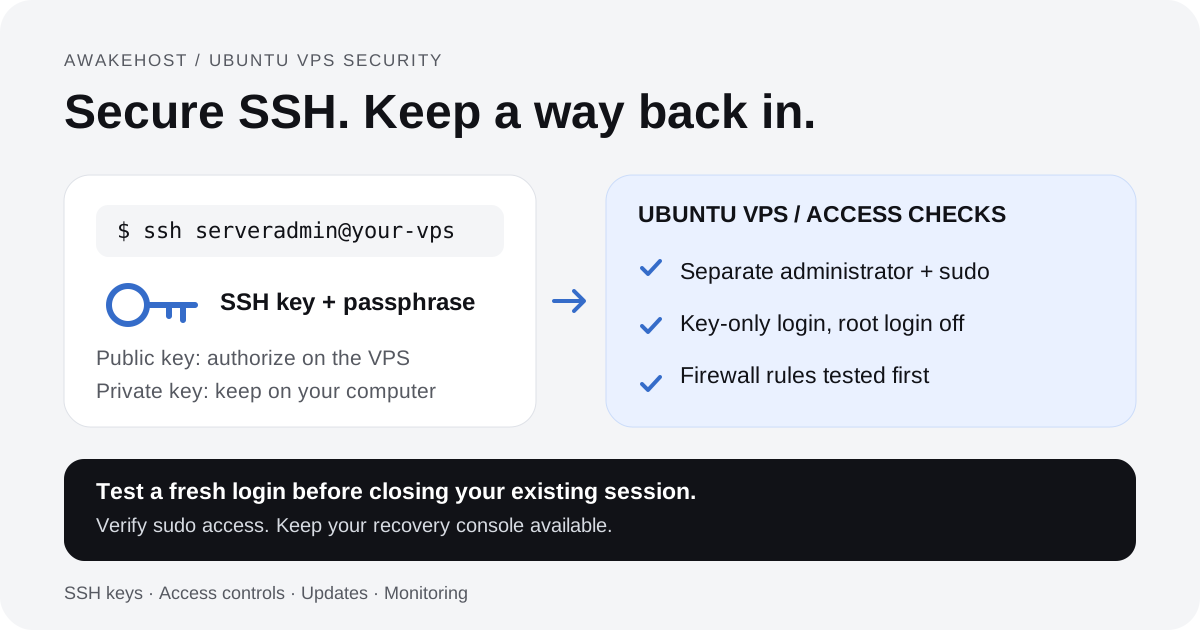
Your Ubuntu VPS is running, and you can connect to it using SSH. That's a good start, but being able to log in doesn't necessarily mean your remote access is configured securely.
A newly deployed server may allow password authentication, accept direct root logins, or expose SSH to anyone who can reach its public IP address. These settings aren't automatically evidence of a vulnerable server, but they can create unnecessary risks when left unmanaged.
Automated scanners routinely search for publicly accessible SSH services. If password authentication is enabled, attackers may try common usernames and passwords to gain access.
Fortunately, securing SSH on an Ubuntu VPS doesn't require complicated software or expensive security tools.
You can make several effective changes using features already available in OpenSSH and Ubuntu.
In this tutorial, you'll learn how to secure SSH access on an Ubuntu VPS by configuring SSH keys, restricting root access, disabling password authentication, setting up firewall rules, and protecting your server against repeated login attempts.
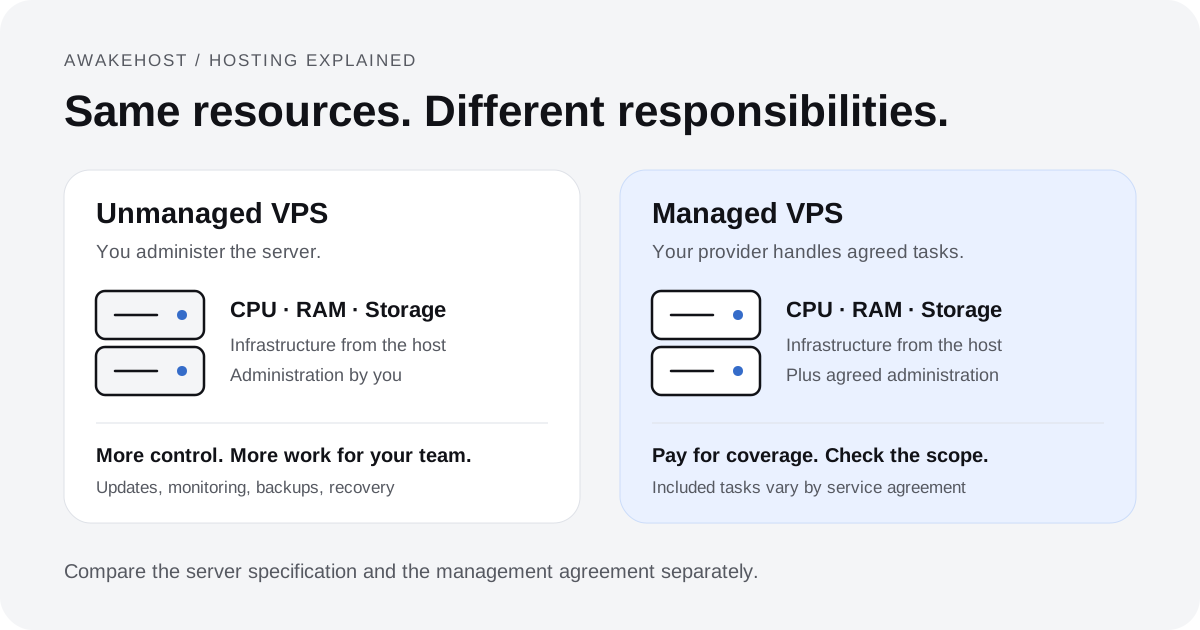
We'll also cover how to test your changes safely so you don't accidentally lock yourself out. For the wider maintenance picture, read our managed vs unmanaged VPS guide. It explains who is responsible for updates, monitoring, and recovery.
What Is SSH, and Why Should You Secure It?
Secure Shell (SSH) is an encrypted protocol used to access and manage computers remotely.
When you connect to an Ubuntu VPS through SSH, you can execute commands, install software, modify configuration files, and perform other administrative tasks without physically accessing the server.
For example:
ssh root@203.0.113.10This command attempts to connect to a server at 203.0.113.10 using the root account.
SSH encrypts communication between your computer and the server. However, encryption alone doesn't determine whether an unauthorized person can authenticate.
If an attacker obtains valid credentials, they may be able to access the server through the same encrypted connection you use.
That is why SSH security focuses on authentication, account permissions, network restrictions, and keeping the SSH service up to date.
Common SSH Security Risks
| Security risk | Why it matters |
|---|---|
| Weak passwords | Attackers may guess or reuse compromised credentials |
| Direct root access | A compromised root login immediately provides administrative privileges |
| Password authentication | Exposes an additional authentication method to password-guessing attempts |
| Unrestricted network access | Anyone who can reach the SSH port may attempt a connection |
| Outdated OpenSSH packages | Unpatched vulnerabilities may expose the server |
| Poorly protected private keys | Stolen keys can allow unauthorized authentication |
| Incorrect configuration changes | Administrators can accidentally block their own access |
No single setting protects against every threat.
A sensible SSH hardening strategy combines several safeguards while keeping a reliable way to recover administrative access.
Before You Start: Avoid Locking Yourself Out
SSH security changes should be made in a specific order.
If you disable password authentication before confirming that SSH keys work, you may lose access to your VPS.
The same applies when restricting root access or modifying firewall rules.
For this tutorial, you'll need:
- An Ubuntu 24.04 LTS VPS with SSH access.
- A user account with root or
sudoprivileges. - A terminal on your local computer.
- Access to your VPS provider's web console or another recovery method, if available.
- Permission to change the server's SSH and firewall settings.
We'll use the following examples:
| Item | Example |
|---|---|
| VPS IP address | 203.0.113.10 |
| Current administrator | root or an existing sudo user |
| New SSH username | serveradmin |
| Default SSH port | 22 |
Replace the example IP address with your actual VPS address. The address used here is reserved for documentation. These examples assume SSH is already listening on port 22. If you use another port, adjust the SSH client, UFW, and Fail2Ban settings before applying them. On the first connection, verify the server's host key fingerprint through a trusted provider console or another verified channel before accepting it.
Important: Keep your current SSH session open throughout the configuration process. Open a second terminal to test every major change before disconnecting the first session.
If your VPS hosts production services, arrange a suitable maintenance window and verify your recovery options before proceeding. Back up the current SSH configuration on the VPS before editing it:
sudo cp -a /etc/ssh "/etc/ssh.before-awakehost-hardening-$(date +%Y%m%d-%H%M%S)"This creates a dated copy that retains the original permissions. Keep it private: /etc/ssh includes the server's private host keys. A backup does not replace a working recovery console.
Step 1: Update Ubuntu and OpenSSH
Start by connecting to your server using your existing credentials.
If the server permits root access:
ssh root@203.0.113.10If it uses a regular account:
ssh ubuntu@203.0.113.10Once connected, update your package information:
sudo apt updateInstall available package updates:
sudo apt upgradeReview the proposed changes before confirming them, especially on a production server.
Next, make sure OpenSSH Server is installed:
sudo apt install openssh-serverCheck the running service:
sudo systemctl status sshYou should see a status similar to:
Active: active (running)On some Ubuntu configurations, SSH also uses systemd socket activation. The service and socket configuration may therefore affect how connections are accepted.
To check the installed OpenSSH version, run:
ssh -VThis reports the installed SSH client version, which is useful for identifying the OpenSSH package family. You can check the actual server package using:
apt policy openssh-serverKeep Ubuntu security updates enabled so important fixes aren't missed.
Step 2: Create a Separate Administrator Account
Using a regular account with sudo is generally preferable to logging in directly as root for everyday administration.
The root account has unrestricted system privileges. Commands executed as root can modify or delete critical files without requiring additional privilege escalation.
A separate administrator account helps distinguish ordinary user activity from commands requiring elevated permissions.
If your VPS already has a working sudo-enabled account, such as ubuntu, you may continue using it instead of creating another.
Otherwise, create a new user:
sudo adduser serveradminUbuntu will ask you to set a password and may request optional account information.
Choose a strong, unique password. You'll need it for sudo operations even after disabling SSH password authentication.
Now add the account to the sudo group:
sudo usermod -aG sudo serveradminYou can verify its group membership with:
groups serveradminThe output should include sudo.
This account will become your primary SSH login after key authentication is configured.
Don't disable root SSH access yet. First, confirm that the new account can connect and perform administrative tasks.
Step 3: Generate an SSH Key Pair
SSH key authentication is one of the most effective improvements you can make to remote server access.
Instead of sending an account password to authenticate, your SSH client proves that it possesses a private key associated with a public key authorized on the server.
An SSH key pair contains two parts:
Public key: Stored on servers where you want to authenticate. It doesn't need to remain secret.
Private key: Stored securely on your computer. It must never be shared or uploaded to the VPS.
We'll generate an Ed25519 key pair, a modern key type supported by OpenSSH.
Generate the Keys on Your Computer
Open a new terminal on your local computer, not inside the VPS.
Run:
ssh-keygen -t ed25519 -C "ubuntu-vps-admin"You'll be asked where to save the keys.
The default location is usually:
~/.ssh/id_ed25519You can accept the default if no key exists at that path. Otherwise, choose a separate filename. Do not overwrite an existing private key. If you choose another filename, use that name in every key-copy and login command below.
Next, SSH will ask for a passphrase.
Use a strong passphrase to protect your private key. This provides additional protection if someone obtains a copy of the key file.
After generation, you'll have two files:
id_ed25519
id_ed25519.pub
The file without .pub is your private key.
The .pub file contains the public key you'll authorize on the VPS.
Do not email, publish, or upload your private key.
Step 4: Copy Your Public Key to the VPS
Now you need to tell your server to accept the new key.
If SSH password login is currently available, ssh-copy-id is a convenient option on Linux or macOS when installed. It is not included on every local computer; use the manual method below if it is unavailable.
From your local computer, run:
ssh-copy-id -i ~/.ssh/id_ed25519.pub serveradmin@203.0.113.10Enter the new account's password when requested.
The command installs your public key in the server user's authorized_keys file.
Its usual location is:
/home/serveradmin/.ssh/authorized_keysIf ssh-copy-id isn't available, or your server already requires key-based authentication, you can install the public key manually using an existing administrator session.
Alternative: Add the Public Key Manually
On your local computer, display your public key:
cat ~/.ssh/id_ed25519.pubCopy the complete output.
In your existing VPS administrator session, create the SSH directory for the new user:
sudo install -d -m 700 -o serveradmin -g serveradmin /home/serveradmin/.sshThen open the authorized keys file:
sudo nano /home/serveradmin/.ssh/authorized_keysPaste your public key on a single line.
Save the file and correct its ownership and permissions:
sudo chown serveradmin:serveradmin /home/serveradmin/.ssh/authorized_keys
sudo chmod 600 /home/serveradmin/.ssh/authorized_keys
The .ssh directory should have permission mode 700, while authorized_keys should normally use 600.
These permissions help prevent other users from changing your SSH authorization settings.
Step 5: Test SSH Key Authentication
This is the most important checkpoint in the tutorial.
Before disabling password authentication, verify that your new account can connect using its SSH key.
Open another terminal on your local computer and run:
ssh -S none -o IdentitiesOnly=yes -i ~/.ssh/id_ed25519 serveradmin@203.0.113.10If everything is configured correctly, your SSH client should authenticate using the private key. -S none prevents reuse of an existing shared SSH connection, so you test a fresh login. IdentitiesOnly=yes limits which keys the client offers, avoiding failures caused by unrelated keys in an SSH agent.
You may be asked for the key's passphrase. This is different from the server account password.
To check that public key authentication works without falling back to password login, run:
ssh -S none -o IdentitiesOnly=yes -i ~/.ssh/id_ed25519 \
-o PreferredAuthentications=publickey \
-o PasswordAuthentication=no \
-o KbdInteractiveAuthentication=no \
serveradmin@203.0.113.10
If the connection succeeds, you have verified that public key authentication is functional.
Once connected, confirm that the account can perform administrative tasks:
sudo whoamiAfter entering the account's sudo password, the result should be:
rootDo not continue until both SSH key authentication and sudo access work.
A successful login alone isn't sufficient if your new account cannot perform administrative maintenance.
Step 6: Disable SSH Password Authentication
Now that your SSH keys work, you can prevent OpenSSH from accepting normal account-password authentication.
This greatly reduces exposure to automated password-guessing attempts.
On Ubuntu, OpenSSH configuration can be stored in:
/etc/ssh/sshd_configIt can also be divided into additional configuration files inside:
/etc/ssh/sshd_config.d/Using a separate configuration file helps keep your custom settings organized.
Create an SSH Hardening Configuration
In your VPS terminal, run:
sudo nano /etc/ssh/sshd_config.d/00-awakehost-hardening.confAdd the following settings:
PubkeyAuthentication yes
PasswordAuthentication no
KbdInteractiveAuthentication no
PermitRootLogin no
MaxAuthTries 3
Save the file.
Here's what each directive does:
| Setting | Purpose |
|---|---|
PubkeyAuthentication yes | Enables SSH public key authentication |
PasswordAuthentication no | Disables ordinary SSH password authentication |
KbdInteractiveAuthentication no | Disables keyboard-interactive authentication |
PermitRootLogin no | Prevents direct SSH logins to the root account |
MaxAuthTries 3 | Limits authentication failures per connection |
Important: This configuration is intended for a normal key-only SSH setup. Do not disable keyboard-interactive authentication if you've already configured an MFA system that requires it. Such setups need different authentication settings.
Why Use a Separate Configuration File?
Ubuntu commonly includes additional SSH configuration files through an Include directive near the beginning of its main configuration.
For most SSH directives, OpenSSH uses the first applicable setting it encounters.
That means changing a value in /etc/ssh/sshd_config may not have the intended effect if an earlier included file has already defined it.
The 00-awakehost-hardening.conf filename is intended to make these settings load early, but you should still verify the complete configuration. Existing files or conditional Match blocks can affect the result.
First, test the configuration syntax:
sudo sshd -tIf the command produces no output and returns successfully, the syntax test has passed.
Next, inspect the effective settings:
sudo sshd -T | grep -E '^(pubkeyauthentication|passwordauthentication|kbdinteractiveauthentication|permitrootlogin|maxauthtries) 'For this setup, you should see:
pubkeyauthentication yes
passwordauthentication no
kbdinteractiveauthentication no
permitrootlogin no
maxauthtries 3
The order may differ. The Ubuntu OpenSSH configuration reference describes these directives and how Match blocks can override global settings.
If the reported settings don't match, examine your SSH configuration files before continuing. When your configuration uses Match, also test the intended user and connection context:
sudo sshd -T -C user=serveradmin,addr=198.51.100.25,host=admin.example.net,laddr=203.0.113.10,lport=22 | grep -E '^(pubkeyauthentication|passwordauthentication|kbdinteractiveauthentication|permitrootlogin|maxauthtries) 'Replace the example user, client IP and hostname, server IP, and port with the actual connection details. Repeat for other administrators or networks governed by different Match rules. See the sshd diagnostic options for connection-context checks. Do not reload while any required login context reports unexpected settings.
Once the settings are correct, reload SSH:
sudo systemctl reload sshOpen a new terminal and repeat the fresh key-only login command from Step 5. Verify sudo again. An existing authenticated session can keep working even when new logins are blocked.
Keep the original session open until you've confirmed everything works.
Step 7: Configure the Ubuntu UFW Firewall
Your SSH authentication settings are now stronger, but the server may still accept SSH connections from anywhere on the internet.
A firewall lets you control which connections reach the VPS.
Ubuntu provides UFW, short for Uncomplicated Firewall, for managing common firewall rules. If it is not installed, install it first:
sudo apt install ufwIf another firewall manager already controls the server, review how it interacts with UFW before continuing.
Check the Firewall Status
Run:
sudo ufw status verboseIf UFW is inactive, don't enable it immediately.
You must first allow your SSH connection through the firewall.
For a server using the default SSH port, you can add a rate-limited rule:
sudo ufw limit 22/tcpThis allows normal SSH connections while restricting excessive connection attempts from the same IP address.
If your server already has an unrestricted SSH allow rule, inspect the existing UFW rules before adding a rate limit. Rule ordering can affect which rule is applied.
Allow Website Traffic If Needed
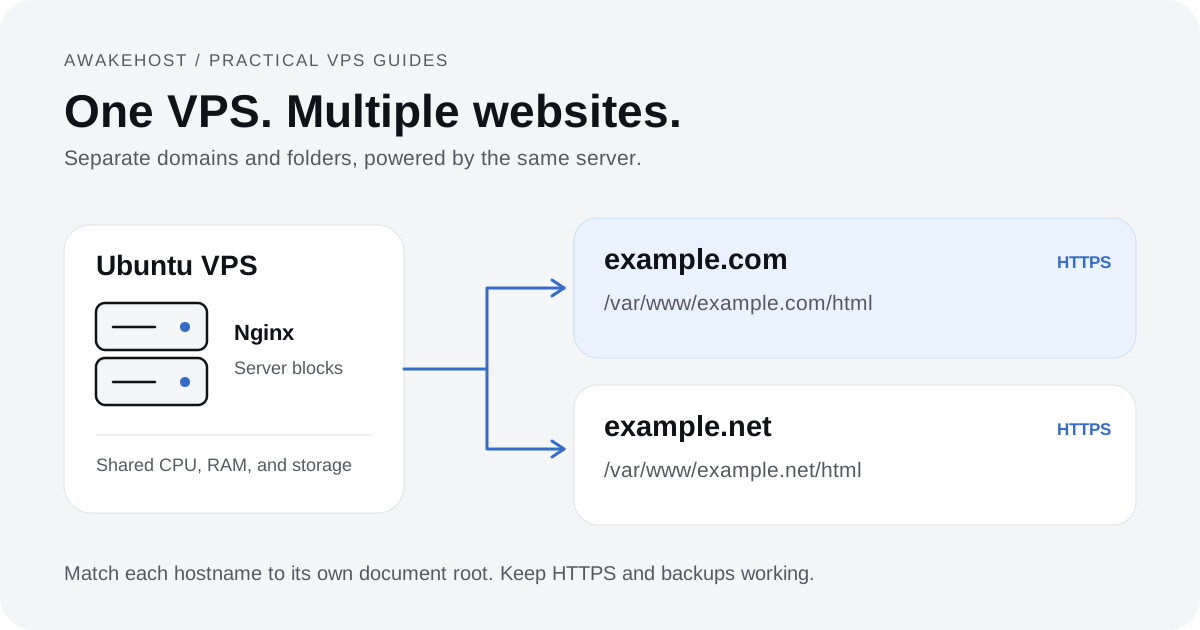
If the VPS also hosts websites, allow HTTP and HTTPS. Our multiple-websites VPS tutorial shows how those services share one server:
sudo ufw allow 80/tcp
sudo ufw allow 443/tcp
Only open ports required by your applications.
For example, a VPS used exclusively for private administration may not need either web port.
Now review the proposed rules:
sudo ufw show added
sudo ufw status numbered
When UFW is inactive, status numbered does not show the pending rules. show added lets you review the saved rules before enabling the firewall. Check the UFW reference when working with existing rules or IPv6.
Check that every required service has a rule. If the rules are appropriate and SSH access is permitted, enable UFW:
sudo ufw enableConfirm the status:
sudo ufw status verboseBefore closing your current SSH session, test a new connection.
Also remember that some VPS providers use an additional network firewall outside Ubuntu. Your SSH port must be permitted by that firewall as well.
Restrict SSH to a Trusted IP Address
If you always connect from a fixed public IP address, you can go further by allowing SSH only from that address.
For example:
sudo ufw allow from 198.51.100.25 to any port 22 proto tcpReplace the example address with your actual public IP.
This approach is most suitable for administrators using a fixed office IP, VPN endpoint, or dedicated administrative network.
It is less convenient when your home or mobile IP address changes frequently.
A trusted-IP allowlist must be combined with an incoming default-deny policy. Simply adding this allow rule does not block other addresses while the earlier limit 22/tcp rule or another broad SSH rule still permits them. Test the trusted-IP connection first, then review and remove the broader SSH rules carefully. Review IPv4 and IPv6 rules separately, and test a fresh login after each change. Do not remove your working access rule until recovery access is ready.
If you can't depend on a fixed IP, SSH keys and carefully configured access controls remain important safeguards.
Step 8: Protect SSH Against Repeated Login Attempts
Even after disabling password authentication, your public SSH service may continue receiving automated connection attempts.
One way to reduce this unwanted activity is to use Fail2Ban.
Fail2Ban examines authentication events and can temporarily block IP addresses associated with repeated failures.
It doesn't replace secure authentication, but it can reduce repeated attempts and unnecessary log activity.
Install Fail2Ban
Run:
sudo apt update
sudo apt install fail2ban -y
Check its service status:
sudo systemctl status fail2banIf necessary, enable and start the service:
sudo systemctl enable --now fail2banConfigure SSH Protection
Create a local SSH jail configuration:
sudo nano /etc/fail2ban/jail.d/sshd.localAdd:
[sshd]
enabled = true
backend = systemd
maxretry = 5
findtime = 10m
bantime = 1h
These settings tell Fail2Ban to monitor SSH authentication events through the systemd journal and apply a one-hour ban when a source meets the configured failure threshold.
The exact behavior also depends on the active SSH filter and firewall ban action.
Save the file and validate the Fail2Ban configuration before restarting it:
sudo fail2ban-client -tResolve any reported errors first. Then restart Fail2Ban:
sudo systemctl restart fail2banCheck whether the SSH jail is active:
sudo fail2ban-client status sshdThe output should identify the jail and display counters for detected failures and banned IP addresses.
If the jail isn't running, check the Fail2Ban service logs rather than assuming the configuration is effective:
sudo journalctl -u fail2ban -n 50The Fail2Ban client reference covers configuration tests and jail status. Also check that the active ban action works with the server's firewall.
Be careful: Fail2Ban can also block your own public IP after repeated failed attempts. Configure and verify any required trusted-address exceptions carefully, especially when administering a remote production server.
For a VPS that already uses SSH keys, a restrictive firewall, and reliable access controls, Fail2Ban is an additional measure rather than the foundation of SSH security.
Step 9: Review and Monitor SSH Login Attempts
Security configuration shouldn't end after enabling a firewall.
Your VPS generates logs that can help identify repeated authentication failures, unexpected login attempts, and configuration issues.
On modern Ubuntu systems, SSH events are available through the systemd journal.
To review recent SSH activity:
sudo journalctl -u ssh --since "1 hour ago"For live monitoring:
sudo journalctl -u ssh -fThese commands can help you investigate failed authentication attempts and SSH service errors.
To review recent successful and recorded historical login sessions, use:
lastLook for unfamiliar accounts, unexpected connection sources, or login times that don't match authorized activity.
Not every unfamiliar IP address represents a successful intrusion. Public SSH servers commonly receive automated scans.
A failed authentication attempt is evidence of an attempted login, not proof that an attacker accessed the server.
If you discover a successful login you cannot explain, investigate it promptly using the available authentication logs, account records, and server activity.
Step 10: Keep SSH Security Updated
SSH hardening isn't a one-time task.
An operating system that was secure when deployed can become exposed if important updates are missed or access permissions change.
Ubuntu supports automatic security updates through unattended-upgrades.
Check whether the package is installed:
dpkg -l unattended-upgradesIf it isn't installed, you can add it:
sudo apt install unattended-upgradesInstalling the package alone does not prove that scheduled updates are enabled. Review Ubuntu's automatic-update guide, then inspect the periodic settings:
apt-config dump | grep -E 'APT::Periodic::(Update-Package-Lists|Unattended-Upgrade) 'A value of 1 enables a daily interval for that setting; 0 disables it. Confirm that the APT timers or your chosen scheduler are active. To check the package's behavior without installing updates, run:
sudo unattended-upgrade --dry-run --debugReview the selected origins and output. Do not assume that the package covers every software source used by your server.
Ubuntu's standard unattended-upgrades settings cover eligible Ubuntu repository updates. Third-party repositories and manually installed applications may require separate maintenance.
For production servers, you should also plan for updates that require service restarts or a system reboot.
At a minimum, review SSH security regularly for:
- Expired or unnecessary administrator accounts.
- Public keys that belong to former team members.
- Unexpected changes to SSH configuration.
- Firewall rules that are no longer needed.
- Available security updates.
- Recent authentication events.
A correctly configured SSH service still requires ongoing maintenance.
Should You Change the Default SSH Port?
Changing SSH from port 22 to another port is a common recommendation, but it isn't a substitute for strong authentication.
A nonstandard port may reduce noise from automated scanners that only probe port 22.
It doesn't prevent a determined attacker from discovering the service through port scanning.
For most VPS owners, SSH keys, restricted administrative access, security updates, and firewall rules offer more meaningful protection.
If you choose to change the SSH port, remember that it affects every system connecting to your VPS.
You must coordinate the SSH listener configuration, UFW rules, provider-level firewall, SSH client settings, and any deployment or monitoring tools that depend on the connection.
On Ubuntu systems using SSH socket activation, changing only the Port setting in sshd_config may not update the effective listening port. The associated systemd socket configuration may also require changes.
There is no need to change port 22 solely to consider your SSH configuration secure.
Should You Enable Two-Factor Authentication for SSH?
Two-factor or multi-factor authentication can add another layer of protection, particularly for shared administration environments and sensitive infrastructure.
There are several ways to implement it.
For example, an organization may require a security key for SSH authentication or combine SSH public keys with an additional authentication factor.
However, these arrangements require more planning than a basic key-only setup.
Some MFA systems depend on keyboard-interactive authentication, which we disabled earlier in this tutorial.
If you intend to use such a system, you'll need to modify the authentication configuration and test the full login process before enforcing it.
Hardware-backed SSH keys can also help protect credentials from being copied, although their authentication behavior and additional verification requirements depend on the key and client configuration.
For a small VPS deployment, an appropriately protected Ed25519 key, a separate administrator account, and restricted network access provide a strong starting point.
For infrastructure administered by several people, evaluate centralized access management and MFA alongside individual SSH credentials.
How to Verify Your Ubuntu VPS SSH Security
After completing the configuration, run a final check.
| Security setting | What to verify |
|---|---|
| SSH key authentication | A fresh key-only login succeeds |
| Password authentication | Ordinary SSH password login is disabled |
| Root SSH login | Direct root SSH access is disabled |
| Sudo permissions | Your administrator account can perform required tasks |
| Firewall | SSH access is allowed only as intended |
| SSH configuration | sshd -t completes successfully |
| Effective SSH settings | sshd -T reports the intended values |
| Login protection | Fail2Ban SSH jail is active, if installed |
| System updates | Security-update mechanisms are enabled and maintained |
| Recovery access | You know how to regain access if your key becomes unavailable |
You can check the main authentication settings together:
sudo sshd -T | grep -E '^(passwordauthentication|kbdinteractiveauthentication|permitrootlogin|pubkeyauthentication) 'The expected settings for the key-only configuration described in this tutorial are:
passwordauthentication no
kbdinteractiveauthentication no
permitrootlogin no
pubkeyauthentication yes
If your setup uses conditional SSH policies, verify those policies for the relevant user and source address as well.
Finally, repeat Step 5's key-only command with -S none from your local computer. This checks a new authenticated connection rather than a reused session.
Only close the original administrative session after confirming that your new connection works and that you can use sudo.
Common SSH Problems and How to Fix Them
Even carefully planned changes can sometimes interrupt access.
The following problems are worth checking before attempting a full reinstall.
Permission Denied (publickey)
This error indicates that public key authentication didn't succeed.
Possible causes include:
- The wrong private key was selected.
- The public key wasn't added to the correct user's
authorized_keysfile. - File or directory permissions are incorrect.
- The SSH username doesn't match the account where the key was installed.
- The server is using an unexpected SSH configuration.
You can inspect the authentication process from your local computer:
ssh -v -S none -o IdentitiesOnly=yes -i ~/.ssh/id_ed25519 serveradmin@203.0.113.10The verbose output provides information about which keys the client offers and how the server responds.
Don't re-enable password authentication without first understanding the problem.
Connection Timed Out
A timeout typically indicates that your computer isn't receiving a usable response from the SSH service.
Check the VPS IP address, network connectivity, provider firewall, and UFW rules.
If you have access to your provider's server console, check whether SSH is running:
sudo systemctl status sshAlso confirm that the expected SSH port is listening.
Connection Refused
A refused connection commonly means nothing is accepting connections on the destination port, or a network control is actively rejecting the request.
Check the SSH service, listening port, and relevant firewall rules.
You can inspect listening TCP sockets on the server with:
sudo ss -ltnpLook for the SSH listener on your configured port.
SSH Stops Working After Configuration Changes
If you still have an active administrator session, check the configuration:
sudo sshd -tThen inspect recent SSH service messages:
sudo journalctl -u ssh -n 50Correct the error before reloading the service.
If you've lost all SSH access, use your provider's recovery console or other previously verified administrative recovery method.
Avoid repeatedly restarting or changing the server without understanding the source of the failure.
WARNING: REMOTE HOST IDENTIFICATION HAS CHANGED
This warning occurs when the SSH host key presented by the server doesn't match the key previously recorded by your computer.
A legitimate server rebuild or host key rotation can cause this warning, but so can an interception attempt.
Don't automatically delete the old entry and accept the new key.
First, verify the new host key fingerprint through a trusted channel, such as a secure provider console or an existing verified administrator connection.
Once you've confirmed the change is legitimate, update your local known-hosts entry.
Final Thoughts: Securing SSH on an Ubuntu VPS
SSH is one of the most useful tools for managing a Linux server, but it also protects access to some of the server's most sensitive administrative functions.
Leaving remote access unchanged after deployment can expose your VPS to avoidable risks.
Start with the settings that matter most: create an appropriate administrator account, configure SSH key authentication, disable unnecessary password and root logins, and restrict access using firewall rules.
From there, maintain security updates, review authentication activity, and add further protections where the workload justifies them.
You don't need to make every SSH setting more restrictive than its default. You need a configuration that is appropriate for your server, clearly understood, and tested before it becomes your only method of access.
Most importantly, preserve a reliable recovery method. Security changes that leave the legitimate administrator locked out can create serious operational problems.
Planning to deploy a new Ubuntu VPS?
Explore AwakeHost VPS hosting to compare available configurations and server locations. Once your VPS is provisioned, use the security checklist in this guide to review its SSH configuration before deploying production applications.
Frequently Asked Questions
How do I secure SSH on an Ubuntu VPS?
Start by creating a sudo-enabled administrator account and configuring SSH public key authentication. After verifying the new login, disable SSH password authentication and direct root logins. Configure UFW to restrict network access, apply security updates, and monitor authentication activity.
Is SSH secure by default on Ubuntu?
OpenSSH provides encrypted communication and supports strong authentication methods. However, the effective security of a VPS depends on its configured authentication methods, user permissions, patch level, network exposure, and provider image settings. Review those settings after deployment.
Should I disable root SSH login?
For ordinary administration, disabling direct root SSH access is generally a sensible choice once you have verified another account with the required sudo permissions. Some specialized automation environments may require different arrangements, which should be carefully restricted and documented.
Is SSH key authentication safer than passwords?
Well-protected SSH keys generally provide stronger resistance to remote password guessing. Their security still depends on protecting private keys, using suitable key algorithms, and removing authorization for keys that are no longer trusted.
Does changing SSH to port 2222 improve security?
Changing the default port can reduce connection attempts from unsophisticated scanners, but it doesn't prevent attackers from discovering SSH. Strong authentication, access restrictions, and regular updates remain more important.
Do I need Fail2Ban if password authentication is disabled?
Not necessarily. SSH key authentication removes the ordinary password-guessing path, while Fail2Ban can still limit repeated failed attempts. Whether it adds meaningful value depends on your network exposure, firewall configuration, and operational requirements.
Can I use SSH keys on Windows?
Yes. Modern Windows versions include an OpenSSH client that can generate and use SSH keys through PowerShell or Windows Terminal. Other SSH clients, including PuTTY, can also use key-based authentication when configured correctly.
What happens if I lose my SSH private key?
If you have no other authorized key or login method, you may lose remote SSH access. Recovery may be possible through your VPS provider's console, rescue environment, or another previously configured administrative method. Maintain secure backups of important credentials and verify recovery procedures before disabling alternative access.